Simple Origami Ideas to Enjoy in Autumn (For 4-Year-Olds)

When summer ends and autumn arrives, we see a big increase in delicious seasonal foods, and there are major events like Halloween, too.
Here are some origami ideas with an autumn theme, designed for 4-year-olds.
We’re focusing on simple folds that are easy to make.
Through origami, children may broaden their interest and curiosity about seasonal foods that peak in autumn and the lives of autumn creatures.
If there are parts they don’t understand, it would be great if they could fold along with their teachers or discuss and proceed with friends—giving them chances to think and to learn the importance of helping one another.
- [Childcare] [Origami for 4-year-olds] Introducing origami for 4-year-old children!
- [Autumn] Easy Origami Ideas for November
- Preschool: Autumn-Themed Craft Ideas Recommended for November
- [Childcare] Simple fall origami ideas
- [Childcare] Things to make in October! Easy origami ideas
- Craft ideas for 4-year-olds to try in autumn! Enjoy creative activities with seasonal motifs and events.
- For 5-Year-Olds: Enjoy Autumn! Easy Origami Ideas
- [For 4-Year-Olds] Fun to Make! A Collection of Halloween Craft Ideas
- A collection of fall origami ideas recommended for 2-year-olds! Make them easily and enjoy autumn!
- [For preschoolers] A collection of origami ideas to enjoy February, including Setsubun and Valentine’s Day
- [Origami] Simple Origami Folding Ideas to Savor Spring with 5-Year-Olds
- [Preschool] Recommended for 3-year-olds! Easy-to-make fall origami craft ideas
- Irresistibly fun to make! Simple mushroom origami ideas you can enjoy with kids
[For 4-year-olds] Simple Origami Ideas to Enjoy in Autumn (61–70)
How to fold a cute fox

After folding the origami paper in half into a square twice to make creases, open it, then fold the left and right edges to meet the central crease.
Next, fold the top and bottom edges to meet the horizontal central crease.
Open and flatten the folded top and bottom sections into boat shapes, then make a mountain fold down the center so the two boats overlap.
Hold the lower-left corner of the top boat and fold it upward perpendicular to the boat to form the fox’s face.
Fold the right corner upward toward the back, keeping the two layers together.
The remaining part is the body, and the section you just folded up is the tail.
Draw the face to finish it cutely.
Cute Halloween candy

After folding the origami paper in half into a triangle twice to make creases, open it up and fold the top and bottom corners in to meet at the center.
Next, fold the bases of the two triangles you created in toward the center line.
Fold the left and right corners inward to make the origami a rectangle, then make stepped folds on the left and right sides.
Flatten the upper and lower parts of those stepped sections into triangles to form a candy shape.
If you fold the corners of the square in the middle to round them, it will look even more like candy.
Add patterns or decorate with stickers to finish it nicely.
Cute Halloween bat

Fold the paper into a triangle by matching the top and bottom corners.
Crease well, then open it.
This time, overlap the left and right corners slightly out of alignment and fold.
Fold up the base, leaving a little of the top corner of the triangle visible, then fold that remaining corner down—this will be the bat’s head.
Fold the paper in half along the vertical center line, and fold in the left and right sides of the head, aligning edges to edges, creasing as you go to shape the bat’s wings.
Once all the creases are made, open the paper and make wavy cuts along the lower part of the wings to finish.
Saury Origami

Fold the rectangular origami in half lengthwise to make it long and narrow, crease well, then unfold.
Fold the top and bottom edges toward the center crease, leaving a small gap.
Fold the two left corners to the center crease, unfold them, then invert the corners along those creases and squash into triangles.
Turn the paper over, fold the left triangular edge to the center crease to make it narrower, then fold the lower right corner up diagonally to meet the top edge.
Fold it back along the first crease you made.
This will be the fish’s tail, so fold the other side as well and adjust the shape.
Fold the origami along the center creases, draw eyes on the face with a pen, and you’re done.
Super easy! Fox face

This is a way to fold a fox face in just five folds.
First, fold the paper in half along the diagonal to make a triangle.
Next, fold so that the two 45-degree corners meet, creating a crease.
Then, fold so that the 90-degree corner aligns with the point where the crease intersects the base.
Finally, fold each of the 45-degree corners upward, and you’re done.
Turn it face up and draw the fox’s face.
With no complicated steps and only a few folds, this is an easy origami project to try.
Origami of acorns and chestnuts

After folding the origami into a triangle twice to make creases, open it up and fold the top corner down to meet the center.
Fold the top edge down to align with the horizontal crease, then fold it down once more along the crease and fold the entire paper into a triangle.
This folded section will become the acorn’s cupule (cap).
Turn the paper over, fold the left and right corners inward so they overlap at the center, then slightly fold in the five corners to refine the shape.
Flip it back to the front, and you’ll have a cute acorn.
This idea works best with double-sided origami paper.
Easy way to make grapes
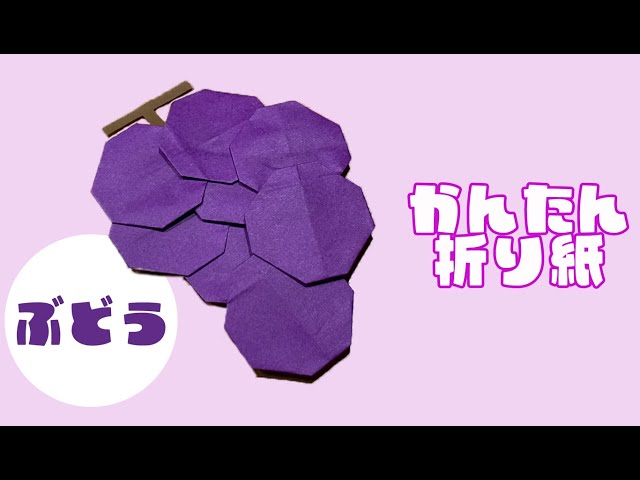
We’ll make this using sheets of origami paper cut in half.
First, fold the origami paper in half vertically, then fold all four corners in toward the crease.
Next, fold it in half so the fold is perpendicular to the first crease.
This will create two 90-degree corners; fold those corners inward toward the center to make creases.
Open it back up, then tuck along the creases to form a square.
Next, take the corner on the closed side of the square and make two small folds; when you open the square, it will look like two quadrilaterals connected together.
Finally, fold the corners to make an octagon, and you’re done.
Make four of these and glue them together to create a bunch of grapes.
Some steps may be a bit hard to understand, so please watch the video carefully as you work.
Since you’ll be making several of the same piece, the children will likely get better at it as they go!