[For 4-Year-Olds] Recommended in November! Autumn-Themed Craft Activities

As the number of chilly days increases, November ushers in the height of autumn.
Many teachers may be thinking, “I want children to fully experience the charms of autumn!”
So this time, we’re introducing creative project ideas for 4-year-olds that are perfect for November.
Packed with ideas that incorporate a variety of autumn-themed motifs—natural materials like acorns and fallen leaves, delicious seasonal foods, and adorable creatures such as bagworms and squirrels—these projects help children feel the essence of autumn.
We also share project ideas related to Shichi-Go-San, so be sure to use them as a reference.
Because we’re introducing ideas that nurture children’s flexible imaginations through making things, we use the term “seisaku” (creative projects) in the main text.
- Preschool: Autumn-Themed Craft Ideas Recommended for November
- Craft ideas for 4-year-olds to try in autumn! Enjoy creative activities with seasonal motifs and events.
- Craft activity ideas for 4-year-olds
- [Childcare] November wall decorations and autumn craft ideas
- Craft Activity Ideas for 5-Year-Olds: November Edition
- [Childcare] For 5-year-olds! Autumn craft ideas
- [November] Enjoy with 3-year-olds! Craft activity ideas recommended for autumn
- [Autumn] Easy Origami Ideas for November
- [Childcare] Fun for October! Craft ideas recommended for 4-year-olds
- [Childcare] Perfect for October! Autumn crafts to enjoy with 5-year-olds
- [October] Craft ideas for fall you can use in childcare
- September: Autumn crafts! Ideas you can use in childcare
- Even 1-year-olds will be captivated! A collection of craft ideas to enjoy the art-filled autumn
[For 4-year-olds] Recommended for November! Autumn-themed craft activities (41–50)
It breaks after 8 folds! How to fold a chestnut

Fold the top and bottom of the origami together to make a crease.
With the white side facing up, fold the two corners on the right into a triangle, aligning them with the crease.
Turn the paper over, place it so the triangle is at the top, then fold the bottom edge up to meet the base of the triangle.
Turn the paper over again and fold the two bottom corners into triangles.
Finally, fold the left and right corners inward to neaten the shape, and you’re done.
This is a very simple folding method, so even children who feel a bit unsure about origami can enjoy making it.
Finish by drawing a face with a pen.
[For 4-year-olds] Recommended in November! Autumn-themed craft activities (51–60)
Easy and cute way to fold an apple (origami)

Let’s make a fall favorite—an apple—using two sheets of origami paper.
Use one sheet for the fruit and the other for the stem.
Fold the paper for the fruit in half twice to make a small square, then open it back up once the creases are set.
Fold the top edge down to meet the horizontal center crease, and fold the bottom left and right corners in toward the center of the paper.
Fold both top corners into small triangles, then tuck in the left, right, and bottom corners to round the overall shape.
Cut a slit at the top center, then open the cut section to the left and right and fold them down.
The fruit is complete.
Next, use a small piece of origami paper to make the stem.
Fold the paper in half by matching the top and bottom edges, then start at the bottom right corner and fold diagonally, rolling it into a narrow strip.
Secure it with glue so it doesn’t come undone, and the stem is finished.
Attach it into the slit you made, and your cute apple is ready!
Easy! How to fold a maple leaf
First, fold the origami into a triangle twice and unfold to create an X-shaped set of creases.
Fold the two edges toward the center along the creases you made, then flip it over.
Fold the narrow pointed section up toward the opposite corner along the diagonal, and flip it over again.
Open up the two areas that can be spread into pockets, and fold them toward the center line so the front matches the shape on the back.
Finally, fold and adjust each corner to form a maple leaf shape, and you’re done.
Make lots in different colors and decorate your room!
Cute parent and child owls

First, fold the paper up to the crane’s basic form.
Take the two open tips (the side that isn’t closed) and fold them toward the center edge to make crease lines.
Next, using those creases, perform an inside reverse fold on both open tips so they align with the center crease.
Fold the closed bottom corner up on both the front and back.
Then fold the bottom corner upward and squash it open like a balloon fold.
Turn it over, and fold the lower tip up along the edge.
Fold the top tip down.
Finally, fold up a little bit to create an owl’s head that slightly sticks out.
Add cute decorations, and you’re done!
Cute! How to fold an origami Totoro

Totoro, a hugely popular Studio Ghibli character, can be made using gray and light peach origami paper, plus two white and two black round stickers.
First, fold the gray paper into a triangle and unfold it, then fold both side edges toward the center crease.
Fold the corners to round out Totoro’s shape.
Next, open out the two edges you folded first to create Totoro’s arms.
Trim a little off the tip of the longest pointed part, and use that piece to make ears and attach them.
Then shape the light peach paper into Totoro’s belly and combine it with the gray paper.
Finally, add Totoro’s eyes with the round stickers, and draw the nose and belly markings with a pen to finish.
Make a cute bagworm with kraft paper and washi tape!
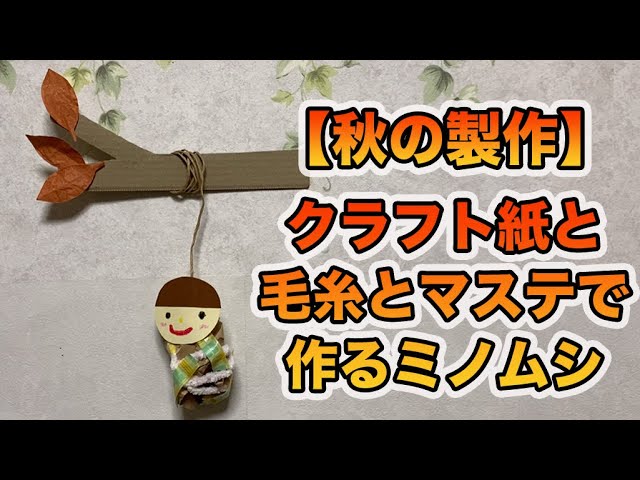
I’ll show you how to easily make a bagworm using kraft paper, yarn, and masking tape! First, roll up the kraft paper to form the body.
Wrap yarn around it and stick pieces of masking tape on randomly.
Next, draw a face on the face parts you made from colored construction paper, then attach it to the body with double-sided tape.
Finally, tape a string to the back of the face with clear tape, and you’re done! If children will be handling it, twine is recommended.
It looks super cute if you also make a tree branch out of cardboard and hang it, so give it a try!
Origami fall leaves using scissors
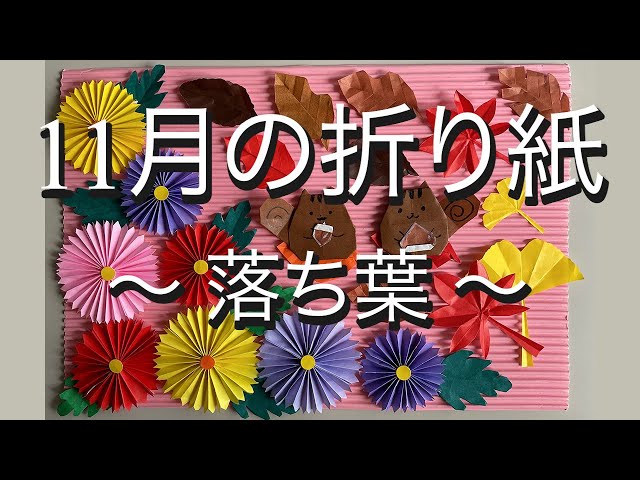
This origami also helps kids practice using scissors! With the colored side facing up, fold the paper into a triangle, then fold up the bottom edge just a little so that the sides line up with the edges.
Keep folding it up like an accordion all the way to the top.
Open the fold you just made once, then, imagining the center vein of a fallen leaf along the closed edge, fold it narrowly on a diagonal.
Next, slightly fold the two corner tips to resemble a fallen leaf.
After shaping it, use scissors to cut small “bug-eaten” holes and details.
Since this requires a bit of fine scissor work, make sure an adult is always there to help.