Simple yet amazing crafts: craft ideas that elementary school students will want to make


“I don’t have much time for crafts…” “But I want to make something that will amaze everyone when it’s done!” If that sounds like you, you’re not alone.
In this article, we’re sharing craft ideas with simple steps that still make you say “Wow!” when they’re finished—featuring clever mechanisms and magical effects.
From moving toys to piggy banks where coins disappear, these are fun, play-with-after-you-make-it projects.
They’re easy to try with everyday materials, so go find your favorite and give it a go!
- For summer vacation homework! Simple and amazing crafts for elementary school students that you’ll want to make after seeing them
- For upper-grade boys! Simple yet awesome craft project [Don’t call it lazy]
- Paper cup crafts that elementary school kids will love! A collection of fun project ideas
- Fun crafts using straws
- Elementary School Students: Simple One-Day Science Project and Craft Ideas
- Simple but awesome! Craft ideas for upper-grade girls
- DIY science projects that elementary school boys will love: ideas you can make with everyday materials
- Recommended for elementary school students! Science fair topics & craft ideas
- Toys you can make from cardboard crafts! Authentic ideas you can build and play with
- [Hand Sewing] Easy crafts recommended for elementary school students. Let's handmake something cute!
- Crafts parents and kids can enjoy together. Recommended craft ideas to keep children entertained.
- [For Upper Elementary Students] Simple but Awesome! A Collection of Summer Vacation Craft Ideas
- [For Kids] Today’s Handmade Craft Ideas
Moving! Playable and Fun Toy Craft Ideas (51–60)
Cute paper cup finger puppets
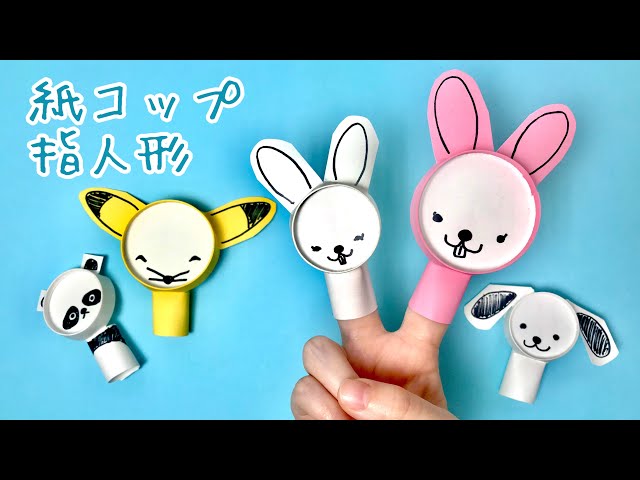
Here’s an idea for making finger puppets using paper cups.
The example shown here is a dog finger puppet, but with a little creativity you can make all kinds of animals.
Once you have a paper cup, cut four vertical slits along the side and remove the excess parts while shaping the dog’s ears and the rings that go around your fingers.
The bottom of the cup will be the face, so draw any expression you like with a pen.
Paper cups come in various colors, so using different colors might expand your range of expression.
Easy! A chopstick rubber band gun that can even use hair ties

This rubber band gun made from disposable chopsticks is very simple—you just bundle the chopsticks together and fasten them with rubber bands.
First, stack four chopsticks and secure them in two places with rubber bands.
To catch the rubber band that will serve as the projectile, leave the top and bottom sticks of the four sticking out a bit longer.
Attach a clothespin together with the topmost rubber band at the rear.
The rubber band projectile is gripped by both the clothespin and the chopsticks; when you pull the clothespin, the band shoots out.
Try using a hair tie as the projectile—it won’t hurt much even if it hits you.
Even grade-schoolers can make it! Triple-shot chopstick rubber band gun
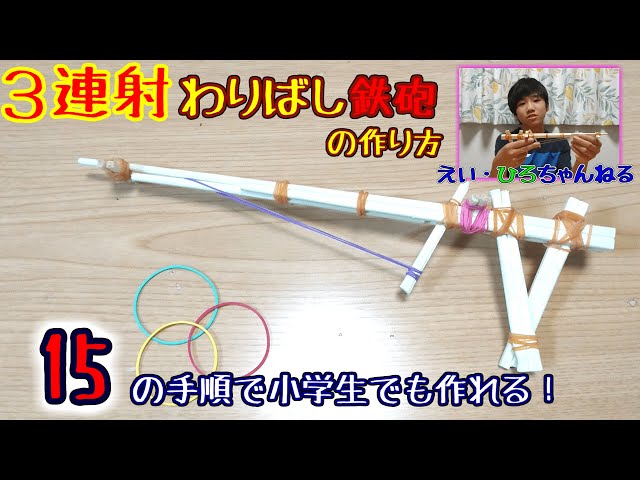
You might think it’s just a simple chopstick rubber band gun, but it actually has a feature that lets you fire three rubber bands.
The building process is straightforward: attach a handle to a bundle of chopsticks that serves as the base, then install a movable trigger so that it’s sandwiched in place.
What’s crucial here are the trigger shape and the positions where the rubber bands are hooked.
By attaching three rubber bands at different positions, they will fire in sequence.
The hooking method for each band is also intricate, so doing that accurately is a key point.
Rubber band gun with two materials
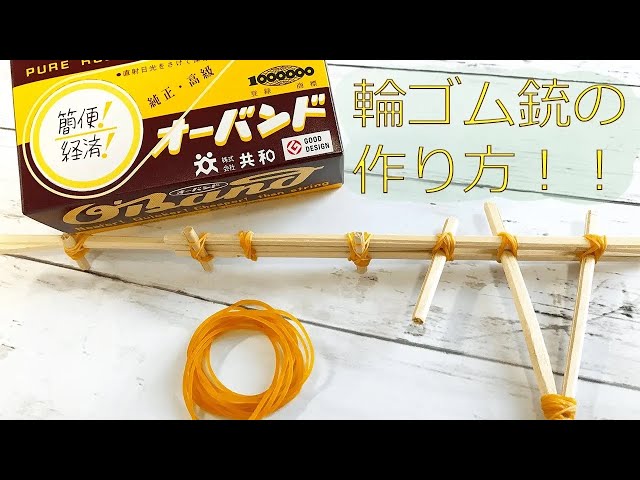
Here’s a simple rubber band gun idea you can make with about three pairs of disposable chopsticks and around ten rubber bands.
Split all the chopsticks into single sticks; leave three as they are, and cut the rest into three different lengths.
If you use a utility knife for cutting, handle it with care.
It’s also a good idea to sand the cut edges for safety.
Combine the cut chopsticks to build the body, grip, and trigger, and finally create a notch at the front end of the body where the rubber band will hook.
The body tends to be long and unstable, so reinforce it by bracing it from below with shorter chopstick pieces.
Moving! Playable and fun toy craft ideas (61–70)
An exceedingly simple chopstick gun
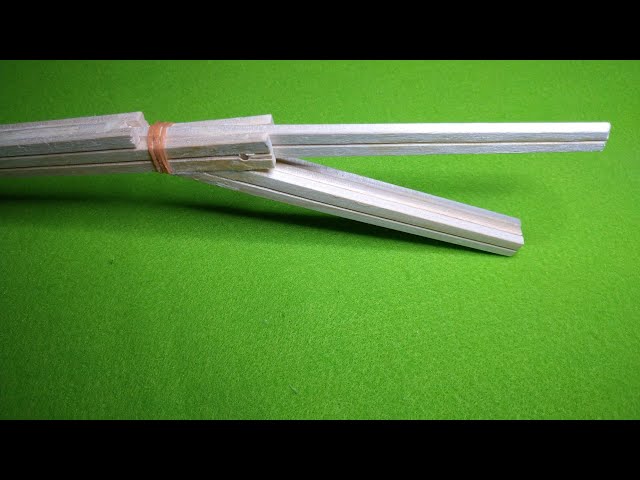
A simple rubber band gun made from disposable chopsticks and rubber bands is a craft project that both kids and adults can get hooked on.
However, the one introduced here is surprisingly authentic, with steps that even involve using a utility knife and a screwdriver.
Kids should make it together with an adult and enjoy the process.
You can also make targets easily with chopsticks, so once you’re done, you can have fun playing a target-shooting game! It’s simple, but you can customize it with a bit of creativity, letting you experience the fun of making things.
Be sure to build and play together—kids and adults alike—and enjoy a great time!
Sumikko Gurashi piggy bank

I’ll introduce how to make a Sumikko Gurashi piggy bank out of origami.
Prepare two sheets of origami paper and one small sheet, then let’s get started.
Use the small origami paper to make the 5-yen coin part.
Fold the corners toward the center, then fold the surrounding corners as well.
It will form the shape of a 5-yen coin, so draw the details with a felt-tip pen.
For the base piggy bank, fold the origami toward the center to create creases.
Following the creases, tuck the paper inward to form a square box.
Make two identical boxes; on one of them, attach the 5-yen coin and draw the face.
The key point is to change the color of the origami depending on the character.
Candy Magnet

Let’s make a magnet that looks like a candy with twisted ends.
The materials and steps are very simple, so it’s highly recommended.
First, prepare strong magnets from a 100-yen shop, a plastic bottle cap, and a fabric scrap with a pattern you like.
Start by gluing the magnet to the back of the bottle cap.
Next, cut the fabric scrap to 14 cm by 10 cm, then fold back and glue three sides, leaving just one of the short sides unfolded.
Once the glue is dry, wrap the bottle cap with the fabric and secure it with glue.
Finally, to create the candy shape, gather and stitch the fabric at both ends with thread.
You’re done! Try making lots in different colors and patterns.