Crafts parents and kids can enjoy together. Recommended craft ideas to keep children entertained.


Here are some recommended craft ideas that parents and kids can enjoy together!
When you hear “crafts,” you might think of summer vacation homework.
But crafts are also perfect for everyday play and passing the time at home!
With common household items like plastic bottles, milk cartons, cardboard, and clay, you can make all kinds of fun creations.
You can have a blast making them with your child, play with what you’ve made, or even exchange your creations as gifts with each other…
You’re sure to share lots of fun moments!
These ideas will captivate both adults and kids, so be sure to enjoy them together as a family!
- For summer vacation homework! Simple and amazing crafts for elementary school students that you’ll want to make after seeing them
- Simple yet amazing crafts: craft ideas that elementary school students will want to make
- Craft ideas using plastic bottle caps [for boys]
- Paper cup crafts that elementary school kids will love! A collection of fun project ideas
- Fun crafts using straws
- [For Kids] Today’s Handmade Craft Ideas
- Adults will be hooked! A collection of craft ideas using toilet paper rolls
- [Indoor Activities] A Collection of Craft Ideas Recommended for Elementary School Students
- [For toddlers] Simple but amazing craft ideas — including toys they can play with
- DIY science projects that elementary school boys will love: ideas you can make with everyday materials
- Toys you can make from cardboard crafts! Authentic ideas you can build and play with
- Made of paper! A fun collection of DIY toy ideas you can play with
- [For Kids] DIY Snowman Craft Ideas!
Crafts parents and kids can enjoy together. Recommended craft ideas to keep children entertained (151–160)
Chopstick grabber
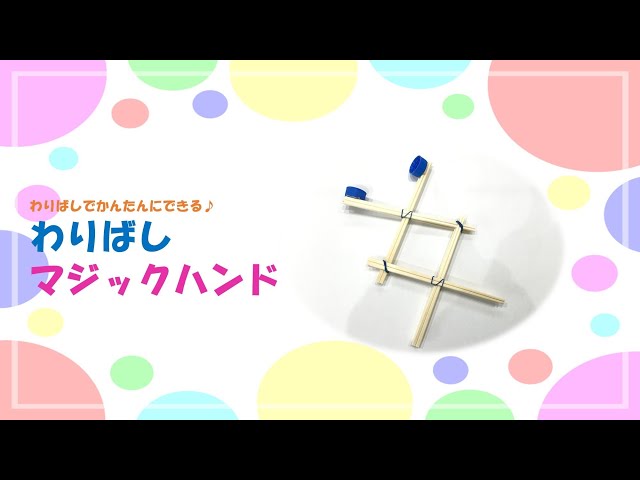
Let me introduce a chopstick grabber that’s fun to make and fun to play with.
Prepare eight wooden chopsticks, double-sided tape, plastic bottle caps, and rubber bands.
Stack four chopsticks in a crisscross pattern and secure the center with a rubber band.
Make another set the same way.
Combine the two finished sets and bind them with rubber bands where the chopsticks overlap to hold them together.
Finally, attach two plastic bottle caps to the tip, and it’s done.
Try moving the handle and have fun playing with it!
Handmade maracas
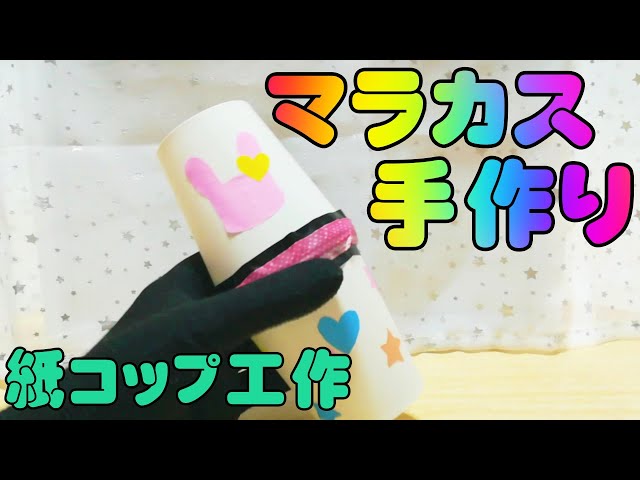
This craft is inspired by maracas made with paper cups that produce a cheerful rattling sound when lightly shaken.
The steps are simple: put beads or finely cut pieces of straw into a paper cup, then cover it with another paper cup as a lid.
What you put inside is important—consider how different fillings change the sound as you make it.
Decorating the outside is also a key point; aim for fun decorations that match the light, lively sound of the maracas.
Paper slingshot made from origami and chopstick sleeves

A slingshot is a Y-shaped gadget used to launch pebbles or paper far into the distance.
At first glance it might seem like just a toy, but similar hunting tools have existed all over the world since ancient times.
The need to propel objects far is what gave rise to that shape.
Let’s try making such a slingshot using chopsticks.
The key to building a sturdy slingshot is reinforcing the space between the Y-shape with a toothpick.
There aren’t any particularly difficult steps, so even younger elementary school children should be able to make it.
You can switch up what you launch—paper, stones, clay, slime, and more—and turn it into a science project-style exploration.
“Wankoppu,” which sounds like a dog’s bark

This is a craft project: a dog mascot made from a paper cup that emits a sound like a real dog when you pull a chopstick attached to its tail.
The key is how to attach the pipe cleaner tail.
Attach a clip to the end of the pipe cleaner, thread it through a hole made in the paper cup, and secure it so that impacts resonate through the cup.
Once this part is complete, decorate the rest using a small paper cup, origami paper, and so on to create the dog’s appearance.
Then, by pinching the pipe cleaner in the gap between the chopsticks and pulling, the pipe cleaner’s vibrations are transmitted to the paper cup, producing a sound that resembles a dog’s bark.
How to make a paper-cup kendama

This is a paper-cup kendama made with a paper cup and plastic bottle caps.
First, poke a hole in the center of the bottom of the paper cup and thread a 60 cm piece of yarn through it.
Be careful not to hurt yourself when making the hole.
Tie a knot at the end of the yarn so it won’t slip out, and secure it to the outside bottom with cloth tape.
Tie a knot in the other end of the yarn as well, place it between two plastic bottle caps facing each other, and fasten them together with cloth tape.
That’s all it takes to complete the main body! After that, customize it with stickers or markers in any design you like.
It’s great because even kids who struggle with a real kendama can have fun and play together!
Paper cup cracker

Party poppers are a must-have at celebrations—the loud pop and the confetti bursting into the air really bring the fun.
This project shows how to make a popper that bursts confetti using a paper cup.
First, make a hole in the bottom of the paper cup and insert a rubber band that’s been tied to a toothpick, anchoring it to the bottom and securing it with tape so it catches firmly.
Wrap one end of the rubber band with folded aluminum foil to create a piece that can strike the bottom of the cup—this completes the base.
Next, put confetti or finely cut pieces of straw inside.
When you pull and release the rubber band to deliver an impact, the contents shoot out like a party popper.
As you build it, experiment to see how the confetti scatters and rises.
Crafts parents and children can enjoy together. Recommended craft ideas to keep kids entertained (161–170)
paper cup trumpet

This is a craft using a paper cup that can produce a trumpet-like sound when you pull the string sharply.
First, make a hole in the bottom of the paper cup, thread a string through it, and secure it with a short, folded toothpick so the string doesn’t slip out.
Then, when you pull the string vigorously, the impact on the string is transmitted to the paper cup, creating a trumpet-like sound.
You can pull the string with your hand, but using chopsticks is also recommended—try it out and see how the sound changes.
Since just building the mechanism can look simple, it’s also important to add your own decorations to the paper cup.