[Childcare] Ideas for March wall decorations


Here are some ideas for March wall decorations that are useful in childcare settings.
March is packed with end-of-year events—Hinamatsuri (Girls’ Day), farewell field trips, graduation, and preparations for moving up or starting school—so it’s easy to wonder what kind of wall displays to make and when to find the time.
The ideas introduced here focus on decorations that can be displayed as complete wall pieces or used as parts.
If you work on them little by little in your spare moments and put them up, your room will not only look more vibrant, but just seeing them will lift everyone’s spirits!
As the weather gradually warms, enjoy creating colorful wall displays to match the season.
- [Childcare] Recommended crafts and activities for March, such as Hina Matsuri (Doll’s Festival) and cherry blossoms
- Perfect for spring: Wall display ideas with a horsetail motif you’ll want to make in March!
- [Childcare] Perfect for spring! Dandelion wall decorations
- [April] Cute spring-themed classroom wall decoration ideas for early childhood education
- [Graduation Ceremony] Add Handmade Flair and Festivity! A Collection of Wall Decoration Ideas
- [Childcare] Ideas for March wall decorations
- [Childcare] Wall decoration craft ideas featuring a cherry blossom motif
- Perfect for spring crafts! A collection of recommended ceiling decoration ideas for childcare rooms
- [Childcare] Fun to Make! Recommended Craft Ideas for Spring
- Nursery/Childcare: Creative Ideas for Making Rape Blossoms (Nanohana) Crafts
- [Kindergarten (older class)] What kind of season is March? Let’s make events and natural objects with origami!
- [Graduation Ceremony Wall Decor] A collection of rainbow-themed ideas to send off the children
- [Childcare] Fun Craft Ideas for Hinamatsuri (Girls' Day)
[Childcare] March wall decoration ideas (1–10)
Dandelion flowers and butterflies

Let us introduce a wall decoration of dandelions and butterflies that will make you look forward to spring.
The dandelions are made from yarn.
Wrap the yarn around and around to create fluffy yarn pom-poms.
Make the leaves from construction paper.
For the butterflies, fold your favorite origami paper in half, draw a butterfly shape, and cut it out.
When you open it, you’ll have an adorable, symmetrical butterfly.
If you attach the butterflies vertically with string or fishing line and hang them as a mobile, they’ll sway in the breeze and look very cute!
Great for wall displays too! Origami horsetails
Fold a sheet of origami paper that’s been cut in half vertically, leaving a small margin.
Fold each of the four corners inward to make an octagon.
Fold the other half of the origami paper in half vertically, then combine the two parts.
It’s cute to draw a face with round stickers or crayons and to make the collar part of the stem.
Displaying it together with March-perfect motifs like butterflies or ladybugs will add a touch of spring.
It’s fun and easy even for 4-year-olds, so why not include it in your craft time?
Cute Footprint! How to Make a Caterpillar
A craft that can be fondly looked back on as a wonderful memory when your child grows up: a Very Hungry Caterpillar made using footprints.
Paint the soles of the feet with paint and make four footprints on construction paper.
Once dry, cut them out and stick them onto a backing sheet along with a caterpillar face made from construction paper, and you’re done.
Decorating with round stickers as you like makes it extra cute.
Preserving those tiny footprints that exist only now will be a lovely memory for your child, as well as for caregivers and parents.
It’s also delightful to feel how much they’ve grown when you look back on it later.
Be sure to try making it together with your child.
[Childcare] March Wall Decoration Ideas (11–20)
Tear-and-enjoy! Butterfly decorations

Let’s try making a cute butterfly decoration.
First, cut paper into the shape of a butterfly and paste it onto a backing sheet.
Then tear pieces of paper and stick them onto the wings to decorate.
Finally, attach the parts for the butterfly’s body and face, and you’re done.
It sounds fun to imagine what kinds of paper to tear, and the very sensation of tearing will be interesting too.
Once finished, it can also be used as a wall decoration.
Your room will be filled with a springtime atmosphere.
Origami four-leaf clover
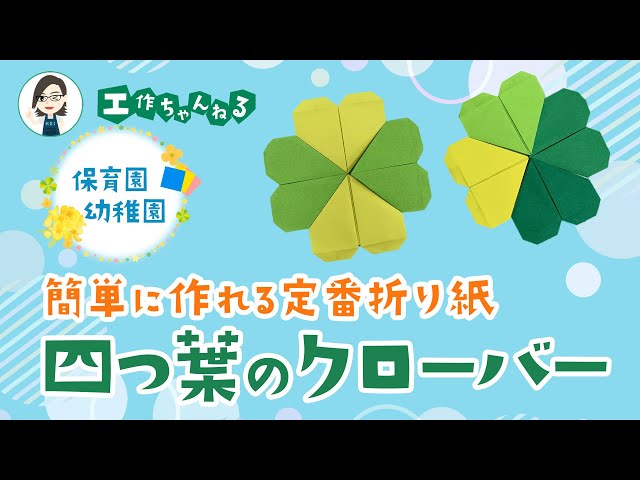
Let’s make a lucky four-leaf clover.
You’ll combine four sheets of origami to create it, but the folding itself is simple, so even children who aren’t used to origami should be able to do it.
Think of it as folding a heart-shaped origami four times.
Once it’s done, you can use it as a wall decoration or paste it onto construction paper as part of a picture.
By the way, the key is to make crisp initial creases.
If they’re misaligned, the whole piece will end up distorted, so be careful.
Stamp play is fun! Cute flowers
Here’s a craft idea that uses a stamp made from bubble wrap to depict cherry blossoms.
Lightly sketch the outline of a cherry blossom on pale pink construction paper, and have the children stamp inside the outline.
It’s fine if they go over the lines—unneeded parts will be cut off later! Encourage them to enjoy expressing themselves as they recall cherry blossoms.
The cutting step can be left to the children as good scissor practice.
If you display the cherry blossoms everyone made on the wall, it’ll feel like you can have a cherry-blossom viewing party right in the room!
Bubble wrap beehive making
@hoiku_ratty Enjoy the texture while you create! Popping Honeycomb 🍯 [Goal] Get to know the shape and feel of bubble wrap and spark interest [Age] 3–4 years old [Materials] Construction paper Bubble wrap Paint Brushes Scissors Glue Everyone, give it a try! Thank you for reading to the end. I’d be happy if you like and follow! Feel free to leave comments with your thoughts or questions♪ ┈┈┈┈┈┈┈┈┈┈┈┈┈┈┈┈┈┈┈┈┈┈ On this account: ✏️ Crafts / Weekly & monthly plans / Event prep / Problem-solving I share easy-to-copy ideas to save time planning projects and make your personal life more fulfilling🪄 “There’s someone I don’t get along with…” “My pay doesn’t match the work!” For those feeling this way, I also offer free job-change support and consultations 🙆🏻♀️ (Even just “I want to know what kind of schools are out there” is OK!) ★ For consultations, visit the URL in my profile ★ @hoiku_ratty ┈┈┈┈┈┈┈┈┈┈┈┈┈┈┈┈┈┈┈┈┈┈Production ideasProduction ideasCraft PlayChildcare craftsWork/Project IdeaNursery teacher / Childcare worker#Nursery School CraftApril#April Production#Spring crafts #Bee Craft
♪ Original Song – Easy Nursery Crafts | Ratty 🐨 by Hoiku R – Easy Nursery Crafts | Ratty 🐨 by Hoiku R
Bees can be scary, but kids are fascinated by beehives! So let’s make a beehive using bubble wrap, which is often used as cushioning material.
First, paint the bumpy side of the bubble wrap with paint.
Yellow and orange are recommended.
Once the paint is applied all over, stamp it onto white construction paper to transfer the pattern.
After the paint dries, cut the paper into multiple hexagons and paste them onto black construction paper to form a beehive.
Finally, stick on a bee made from construction paper—and it’s complete!