[Indoor Activities] A Collection of Craft Ideas Recommended for Elementary School Students

These days, DIY has firmly taken root as a go-to hobby.
When you visit a home improvement store or a 100-yen shop, you’ll even find dedicated sections for it.
Plenty of households probably already have the materials and tools on hand.
In this article, we’ve rounded up craft ideas recommended for elementary school students who are interested in making things!
We’ll introduce everything from board games everyone can play together to practical ideas you can keep using at home after you’ve made them.
Find the project that suits you best and give it a try!
- Crafts you can make with 100-yen shop items! A collection of fun project ideas that elementary school kids will love
- Simple yet amazing crafts: craft ideas that elementary school students will want to make
- [For Elementary School Kids] Handmade Toy Craft Ideas
- [Let’s Make and Play!] Handmade Toy Ideas You Can Create Yourself
- [Summer Vacation Crafts for Lower Grades] Make It with Everyday Materials! Simple Yet Awesome Craft Ideas
- Handmade games: DIY craft ideas you can make and play
- [For Upper Elementary Students] Simple but Awesome! A Collection of Summer Vacation Craft Ideas
- [DIY] A Collection of Handmade Moving Toy Craft Ideas
- [For Kids] Have Fun at After-School Day Service! A Special Feature on Indoor Game Ideas
- Toys you can make from cardboard crafts! Authentic ideas you can build and play with
- For summer vacation homework! Simple and amazing crafts for elementary school students that you’ll want to make after seeing them
- For upper-grade boys! Simple yet awesome craft project [Don’t call it lazy]
- Crafts parents and kids can enjoy together. Recommended craft ideas to keep children entertained.
[Indoor Play] Craft Ideas Recommended for Elementary Schoolers (11–20)
Marble Kaleidoscope

A marble kaleidoscope that’s perfect for at-home crafting time or independent study projects.
It’s great because you can make it easily with everyday items like marbles and candy containers! First, take acrylic mirrors (you can get them at 100-yen shops), cut them into strips, and combine them to form a triangular tube.
Next, make a round hole in the bottom of a candy container, insert a marble and then the mirror tube, and close it with a lid that you’ve pre-punched—done! Kaleidoscopes may seem hard to make by hand, but you can actually put one together easily with surprisingly simple materials.
Add your favorite decorations to create a kaleidoscope with your own original design—how lovely!
Sumikko Gurashi piggy bank

I’ll introduce how to make a Sumikko Gurashi piggy bank out of origami.
Prepare two sheets of origami paper and one small sheet, then let’s get started.
Use the small origami paper to make the 5-yen coin part.
Fold the corners toward the center, then fold the surrounding corners as well.
It will form the shape of a 5-yen coin, so draw the details with a felt-tip pen.
For the base piggy bank, fold the origami toward the center to create creases.
Following the creases, tuck the paper inward to form a square box.
Make two identical boxes; on one of them, attach the 5-yen coin and draw the face.
The key point is to change the color of the origami depending on the character.
How to make melon cream soda

Melon soda isn’t just refreshing in taste—the vibrant green color alone gives off a sense of fun.
Focusing on that look, this project shows how to make a colorful mascot using simple materials.
The main materials are jelly-like modeling clay and crushed stones; by combining them well, you can recreate the sparkle of melon soda.
Fill a cup with jelly clay and crushed stones, then place white clay on top to resemble ice cream, and finish with decorations like a cherry and a straw.
Think about angles and proportions as you work to make it look as realistic as possible.
Aquarium snow globe

Let me introduce a refreshing aquarium-style snow globe.
Prepare liquid laundry starch (or glue), a sponge, a jar, miniature figures, ribbon, adhesive, glitter, and a chopstick.
Cut the sponge to the shape of the jar lid to make a base, then glue it in place.
Attach the figures onto the base using adhesive.
Put glitter into the jar, then add water and liquid laundry starch in a 1:1 ratio and mix well.
Close the jar with the lid that has the figures attached, making sure no air gets in, and you’re done.
Decorate it and create your own original snow globe!
Refreshing! Square Bag
https://www.tiktok.com/@n.annlee321/video/7530934170718080263Here’s an idea for making a bag using bag hardware from a 100-yen shop, plant pot mesh, and yarn in your favorite color and material.
First, cut the plant pot mesh to match the size of the bag hardware, then crochet or stitch the yarn onto the mesh.
Once you’ve finished attaching the yarn, sew the mesh and the bag hardware together.
Finally, add the handles and your favorite decorations to complete the bag.
With this method as a reference, it seems like you could create all kinds of items depending on your ideas!
cool pen holder

Let me introduce a very handy and stylish pen holder.
Prepare a wooden box, wooden boards, an interior mesh frame, paint, a brush, glue, and sandpaper, and let’s get started.
Cut the wooden boards, paint them, and glue them together.
Glue on the interior mesh frame as well.
Once it’s dry, it’s complete.
This pen holder makes the contents easy to see and offers great ventilation—give it a try! Adding illustrations or decorations to give it a personal touch will make it even more wonderful.
[Indoor Activities] Craft Ideas Recommended for Elementary School Students (21–30)
Marble run made from cardboard
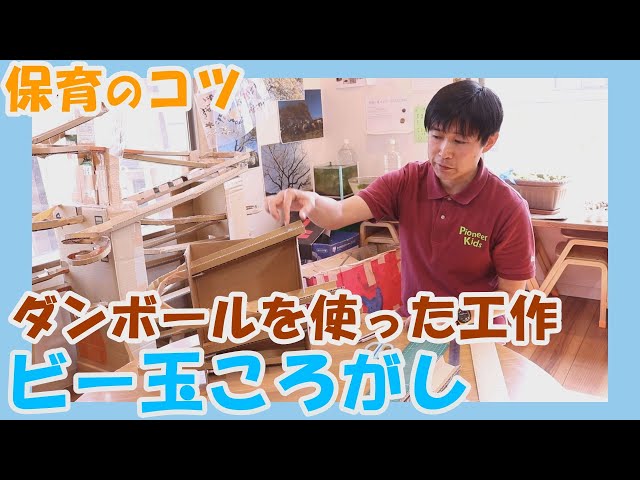
Let’s try making a cool marble run using cardboard.
Prepare a rectangular piece of cardboard that isn’t too thick, and cut off one section on the large face and one section on the narrowest side.
Then, using the pieces you removed and other bits of cardboard, build the pathways for the marble to roll along and attach them to the base cardboard.
Instead of connecting every path all the way through, it’s also fun to leave gaps here and there so the marble drops down to the next level and continues.
Be sure to set up the goal area so the marble stops securely and doesn’t roll out after reaching the finish.