Fun Fish Craft Ideas to Make at Daycare and Kindergarten


We’re introducing craft ideas with a fish theme that kids can enjoy at daycare and kindergarten!
Let’s make cute, swimming fish.
Using sparkly tape, tissue paper, and stickers, you can create colorful fish.
You can also enjoy trying various techniques.
From infants to older kindergarteners, there are plenty of ideas that work well in childcare settings.
Be sure to use these as a reference and have fun creating!
Because we are highlighting ideas that make the most of each child's free, individual expression, we use the term “seisaku (制作: production/creation)” in the main text.
Want to make these at nursery school and kindergarten! Fun fish craft ideas (1–10)
[Aluminum Foil] Ocean Motif
https://www.instagram.com/p/CtYh2jmp7Px/Let’s make shiny shells and fish using aluminum foil.
First, stick aluminum foil onto construction paper, then cut out shell and fish shapes with scissors.
Put them into a bag, add a little bit of about three different colors of paint, and seal it.
Now you’re ready! Have the children spread the paint over the shapes by pressing and rubbing the bag with their hands and fingers.
Once the paint has spread all over, take the pieces out of the bag and use a cotton swab to draw eyes and scale patterns.
You can’t do this step once the paint dries, so be sure to do it before it dries.
Painting both sides and hanging them as decorations is also a cute idea.
Stained glass-style fish
https://www.instagram.com/p/CiC7rj4J-NW/These stained-glass-style fish shine as they reflect the light, making them a perfect craft to display in the classroom.
Cut construction paper into the shape of a fish, then cut out the center and stick OPP tape on the back.
Prepare several colors of cellophane cut into small pieces, and have the children stick them onto the OPP tape.
Attach the dorsal fin and tail, and it’s done! Choose a sunny spot in the classroom and hang them from the ceiling, and the room will transform into an aquarium! The children will surely find themselves gazing up, watching the fish swim overhead.
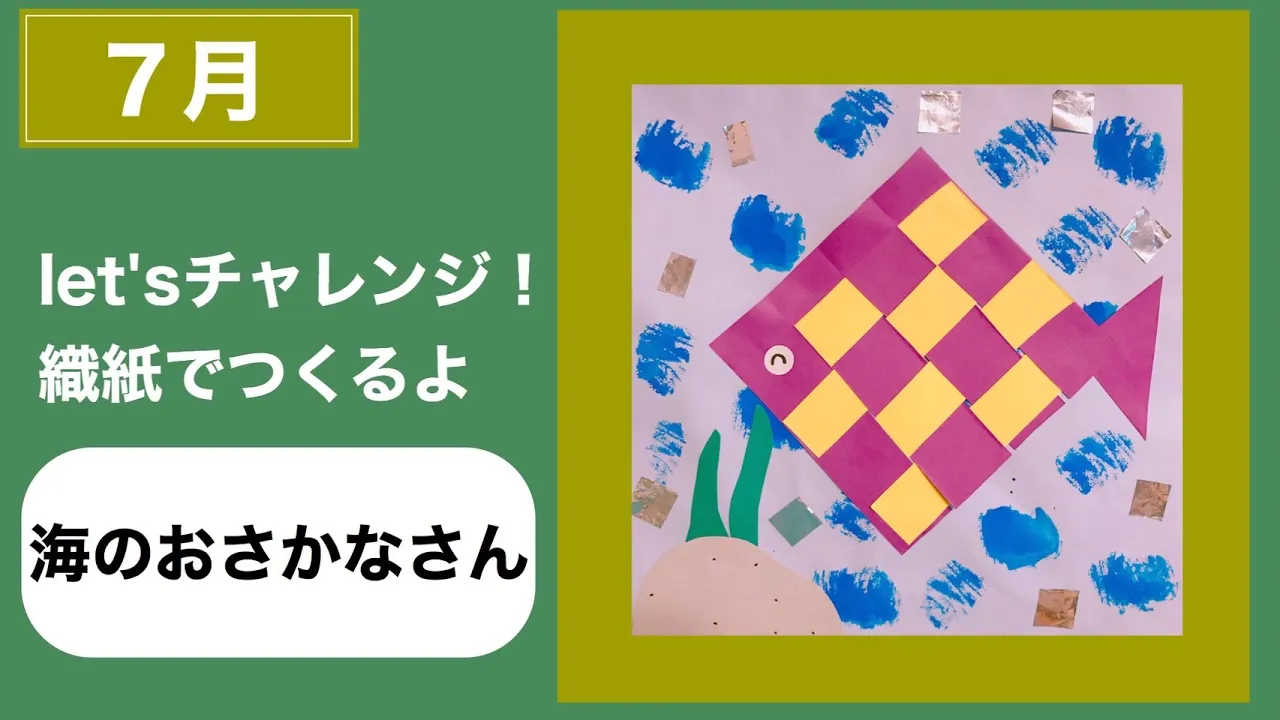
Fish made of origami paper

Let’s make colorful fish out of origami! Prepare two sheets of origami paper in your favorite colors.
Cut one sheet with long, thin slits, and cut the other into long, thin strips.
Weave the strips through the slits to combine them.
Since this step is a bit tricky, it’s recommended that a teacher provides support.
For the fish’s background, prepare construction paper decorated with colors applied using a sponge dauber or with small pieces of cut origami paper glued on.
Once you combine the finished fish with the background, it’s complete! If you let the children freely choose their colors—starting with the origami color combinations—they’ll enjoy the rest of the craft even more.
(Footprint) Swimming Goldfish and Goldfish Bowl

Making a goldfish bowl with swimming goldfish creates a cool, refreshing look—perfect for a summer craft.
Since it uses footprints, it also becomes a sweet keepsake of a child’s growth.
First, the teacher sticks a paper goldfish bowl and water plants onto construction paper.
Next, take footprints of the one-year-olds on a separate sheet.
Using solid red is fine, or leave the toes white for a cute finish.
Once the footprints dry, cut them out, put double-sided tape on the back, and attach the goldfish fins.
Let the children “swim” their footprint goldfish by sticking them wherever they like.
Add white round stickers to represent bubbles.
To finish, the teacher should attach tissue paper as the goldfish tails.
Handmade fishing

On summer days spent indoors, let’s play “homemade fishing.” Make the “fish” out of paper cups, jelly cups, toilet paper rolls, or colored paper placed inside plastic bags, and attach magnets with tape.
People will love it if you make a variety like turtles, jellyfish, and crabs.
For the “fishing rod,” use chopsticks and string, and tape a magnet to the end of the string.
If you create an “ocean” by lining a milk carton or cardboard box with flyers or newspaper, it will feel even more atmospheric and fun.
A shiny fish wrapped in aluminum foil
https://www.instagram.com/p/Cs_FTzepUmp/How about making a shiny fish using glittering silver aluminum foil? It looks like stained glass and is perfect for a summer craft.
First, cut both construction paper and drawing paper into the shape of a fish.
For the construction paper, cut out just the body—a fish without a tail.
Make slits at the top and bottom of the construction paper piece and hook twine through them to represent scales.
Cover it with aluminum foil and secure it with tape on the back, then press the foil on the front so the twine pattern stands out.
Use permanent markers to add color between the strands of twine, then layer and glue it onto the fish cut from drawing paper.
Draw the eye, and your shiny fish is complete.
[Age 3] Round uchiwa fan with a transparent goldfish
![[Age 3] Round uchiwa fan with a transparent goldfish](https://i.ytimg.com/vi/lK3_1vPSMnM/sddefault.jpg)
Here’s a craft idea for making transparent goldfish with a refreshing, summery look using clear folders and colored cellophane.
Cut two pieces of thick paper into 20 cm diameter circles.
In the center of each, cut out a fish shape, and at the bottom, make a 3 cm diameter hole.
Attach a piece of clear file (cut large enough to cover the fish opening) to the thick paper, then layer and stick on cut pieces of colorful cellophane to create scales.
Place the second piece of thick paper on top and glue them together, then draw the fish’s face.
In the blank areas of the thick paper, draw bubbles and aquatic plants to finish.
For the eyes, draw pupils on round stickers; for the mouth, cut a round sticker in half and color it pink or red.