Kids will love it! Easy origami ideas—great as gifts too!


How about creating a special moment with a moving origami gift that makes children’s eyes light up? Shake it and—pop! We’ll introduce origami ideas that look like ordinary paper crafts but are packed with playful surprises, like a cracker that makes a popping sound when you shake it, a top that spins smoothly, and cherry blossoms that bloom when sprinkled with water.
These moving origami creations are easy to make yet guaranteed to delight kids, perfect for birthdays and celebrations or even for a small everyday surprise.
Craft a heartfelt gift and enjoy a fun time together!
- [Origami] She’ll love it if you fold these! Simple ideas for girls
- Cool origami that boys will love and want to fold
- Simple origami that can be folded from a single sheet
- Cute Origami Ideas for Girls
- Origami ideas boys will want to make!
- Let's make it with origami! Ideas for simple 3D creations
- Popular characters that are easy to make with origami. A collection of creations you can enjoy with children.
- [For Kids] Let's Fold! Today's Origami Idea Collection
- It moves! You can play with it! Fun origami. How to make origami toys.
- Made of paper! A fun collection of DIY toy ideas you can play with
- Kids’ Origami: Cute and Easy Ideas to Make for a Birthday
- [Kids] Let’s Make Origami! A Collection of Easy Goldfish Folding Methods
- At the End of Preschool Practicum: Simple and Cute Handmade Gifts
Origami for Accessories and Gifts (11–20)
Heart Ring

I’m going to show you how to make a ring—something every girl loves—using origami.
Prepare one sheet of origami paper and cut it into four equal pieces.
First, fold the paper in half, then fold it in half two more times.
When you open it up, you’ll see seven horizontal crease lines.
These lines are very important, so make sure to crease them sharply.
From here, you’ll fold along those lines; the steps aren’t too difficult, so try using shiny paper or cute patterns—whatever you like.
If the small size makes it hard to fold, you can use a full sheet to make a larger version and enjoy it as a bracelet!
Unicorn bookmarkNEW!
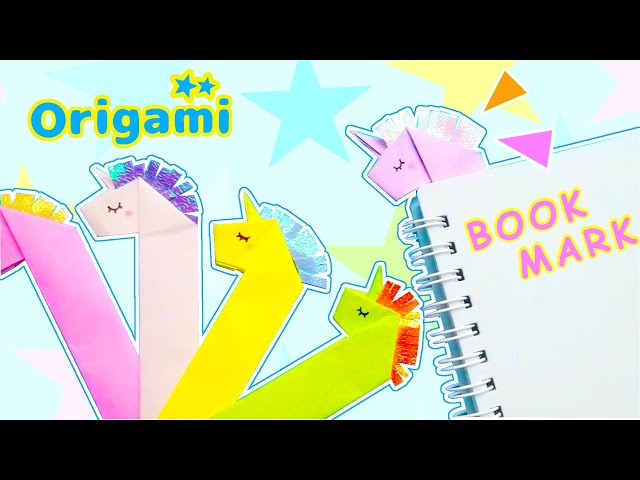
Here’s an origami idea that combines practicality with cuteness.
It’s meant to be used tucked into a book, and when you insert it into a closed book, the design looks as if it’s peeking out from inside—very eye-catching.
The folding process is relatively simple: you shape it so the neck becomes long as you go.
Adding eyes and a mouth to the face gives it expression, and the overall vibe can change dramatically depending on how you draw them.
Color choice also affects the impression—soft hues create a calm look, while bright colors make it pop.
Because you can enjoy it in everyday use, it’s not just something you fold and forget; it’s an idea that comes alive in daily life.
A Playable! Ribbon Ring OrigamiNEW!

Also great for pretend play! This is an origami ring with a cute ribbon.
First, fold into a square and fold the front edge up to the center, then cut.
Take the cut piece and fold the top and bottom edges to align with the crease.
Fold the left and right edges in to meet the center.
Fold the top and bottom edges to the central crease.
Unfold, then make inside reverse folds along the creases.
Open it and fold the layers inward along the creases.
Fold the left side to the right, using the upper and lower right corners as a guide, to the right.
Fold only the top layer of the top and bottom to align with the center slit.
Next, fold the left and right edges.
Flatten the triangles.
Turn it over and tuck the left and right edges into the inner gaps.
Once tucked, fold the ends.
Fold the left and right sides along the outside of the triangles to shape it into a ring, and you’re done!
Cute and easy! How to fold a balloonNEW!

Origami balloons are highly recommended for those looking for decorations for a birthday message card or a little accent for a short letter.
The curled strips of paper create a fluffy, balloon-like look—such a clever touch.
The balloon part is surprisingly easy: just fold the paper a few times to gradually make it round.
For the string, cut origami paper into thin strips and wrap them around a pen to give them a springy curl.
You can make them quickly, so you’ll probably want to make a lot.
It’s also nice that you can choose colors to match the season—white like snow in winter, blue like the sea in summer, and so on.
Birthday cake trinket boxNEW!

A birthday party just isn’t complete without a birthday cake.
Wherever people gather—at celebratory parties or Christmas get-togethers—there’s always a cake, right? So let’s try making a cake-shaped trinket box inspired by those festive cakes! The process is divided into three main stages: the box body, the box lid, and the decoration on top of the lid.
Since the lid’s decoration includes parts as small as 1 cm, this project is probably best suited for upper elementary school students or older.
If an adult learns the steps first and then teaches everyone, it might go more smoothly.
Perfect for small gifts! Gift wrappingNEW!

If you’re thinking that a birthday present might feel a bit plain when both the wrapping bag and its contents are store-bought, how about a handmade mini pouch made from origami? It’s the perfect little pouch for small chocolates or candies, so once you learn how to make it, you’ll find it handy in many situations.
All you need is origami paper and glue—even if you’re not confident with crafts, it’s OK! Using 15 cm × 15 cm origami paper yields a palm-sized pouch.
Since it’s made by layering the paper, it’s reasonably sturdy too, which is a nice bonus.
Flat present boxNEW!

A flat present box you can make from a single sheet of origami paper is a cute idea to stick onto a birthday card.
First, fold the paper inward twice, crease firmly, then unfold.
Rotate it, fold back the other way, and fold to the crease; flip it over and repeat the same folds.
To create the ribbon in the center, fold triangles as if forming a bow, then open and squash-fold to give the ribbon a three-dimensional shape.
Finally, secure with glue and adjust the shape to finish.
Making crisp creases results in a neat finish, and simply changing the color or pattern can dramatically change the look.
Origami for Accessory and Gift Use (21–30)
Cute Randoseru CardNEW!
You can write a message on the inside of the flap and even put candy in the inner pocket! Here’s a perfect randoseru (school backpack) card for gifts.
You’ll make the body, the flap, and the shoulder straps.
Use 15 cm origami paper for the body and flap, and use a sheet that’s half of a half (1/2, then halved again) for the shoulder straps.
For the body, fold the bottom edge up to a point 3 cm from the top, flip the paper over, and fold the left and right edges to meet at the center line.
For the flap, fold the paper in half by overlapping the left and right sides, then fold both bottom corners into small triangles.
Tuck those triangles inward, insert the top part into the body, and finish assembling the backpack.
For the shoulder straps, just fold the origami in half and attach them!
A long-tailed tit backpackNEW!

The illustration of the long-tailed tit is such a cute idea! You can make this with a single sheet of origami, but after creasing it, cut off the parts to be used for the lid and the shoulder straps with scissors.
Assemble the remaining part into a box to form the body.
For the long-tailed tit on the lid, use a piece of origami cut to one-quarter size.
Fold one corner on the short edge to round it, then fold it up so the white side shows, and draw the eyes and wing patterns with a pen.
It’s such a wonderful piece that makes you think, “I wish there were actually school backpacks like this!”
Origami ribbon with a heartNEW!

This is an adorable ribbon featuring a heart in the center.
It’s amazing that it’s made from just a single sheet of origami, isn’t it? Pick your favorite color or patterned paper and let’s get started! After cutting the origami paper in half, fold it lengthwise.
Unfold it and fold the sides along the crease.
Fold it in half vertically to start forming the ribbon shape.
Along the way, you’ll be able to create a heart in the center.
Some steps are a bit intricate, but you’ll feel a great sense of accomplishment once it’s finished.
It also makes a wonderful gift for children or for women.