Recommended for elementary school students! Science fair topics & craft ideas


Speaking of summer vacation, choosing a topic for the independent research project can often be tough.
Science experiments and crafts are both fun! If your child is good at crafts, we recommend crafts because they can enjoy the process as they go.
When they get absorbed in it, they might even finish in just a few days.
Here, we’ll introduce a variety of ideas for independent research and crafts! If you’re struggling to pick a theme, please use these as a reference.
To create fun summer memories, make a one-of-a-kind project of your own!
- For summer vacation homework! Simple and amazing crafts for elementary school students that you’ll want to make after seeing them
- Simple yet amazing crafts: craft ideas that elementary school students will want to make
- Elementary School Students: Simple One-Day Science Project and Craft Ideas
- DIY science projects that elementary school boys will love: ideas you can make with everyday materials
- [For Upper Elementary Students] Simple but Awesome! A Collection of Summer Vacation Craft Ideas
- For upper-grade boys! Simple yet awesome craft project [Don’t call it lazy]
- Fun crafts using straws
- Recommended for lower elementary school students! A collection of plastic bottle craft ideas made with everyday materials.
- Simple and cute summer project crafts! A collection of ideas for girls that will make you want to create
- [Middle School Students] Easy One-Day Science Projects and Crafts Ideas
- Toys you can make from cardboard crafts! Authentic ideas you can build and play with
- Simple but awesome! Craft ideas for upper-grade girls
- Crafts parents and kids can enjoy together. Recommended craft ideas to keep children entertained.
For upper grades (141–150)
Experimenting with resin?!
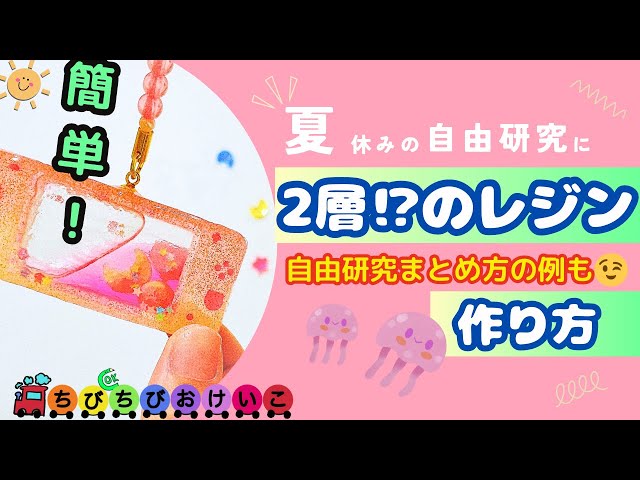
If you want to try your hand at making things with resin, why not purchase a resin craft kit? It comes with all the basic materials and tools, so you can start creating right away.
Deciding what shape to make and which parts to decorate with—and bringing your ideas to life—is a lot of fun.
While resin is often used for crafts, you can also do experiments, such as comparing how quickly different resin liquids cure! If it’s your first time, please work together with a parent or guardian.
Gem-like soap

Gemstone soaps are available as DIY kits, but they’re easy to make as long as you have glycerin soap and coloring.
Cut the glycerin soap into small pieces and place them in a container, then heat in a microwave at 500W for 10 seconds.
Mix in your favorite colorant to add color, and add aroma for fragrance.
Once you’ve made a few colors, pour them into another container in layers and let them set—that’s it! Try changing the color combinations and see what kinds of gemstones you can create.
Using a clear soap base also gives a light, airy look and is highly recommended.
Lots of soap bubbles with DIY
https://www.tiktok.com/@sachimama_asobi/video/7268883132554808578Let’s have fun making soap bubbles using short-cut straws! First, cut a long strip of double-sided tape and line up the straws, sticking them onto it.
Apply double-sided tape to the other side as well, then roll the straws up tightly from the edge into a spiral and secure it.
Glue on a ring cut from a plastic bottle to serve as a frame, and attach a stick as a handle to finish.
Dip it in bubble solution and blow.
Bubbles will come out from each straw, creating a beautiful effect, and lots come out at once, so even small children can enjoy it.
For upper grades (151–160)
Cute beaded candy craft
@n.annlee321 Please do it with cute beads ☺️💓#tiktok classroomLife with childrenSummer Vacation Craft#StayHomeTime
♬ Monkeys Spinning Monkeys – Kevin MacLeod & Kevin The Monkey
Let’s make cute candies using your favorite beads! Cut the soft case into your preferred shape, fold it in half, then use a hair iron to apply heat and seal the edges to make a little pouch.
Fill it with beads and seal the opening.
Stick masking tape on both ends of the candy, trim it with a zigzag cut, and you’re done.
Try using different beads to create various kinds of candies.
If you make the bag for holding the candies the same way, it’ll look extra cute and really stand out.
Spinning piggy bank
@silk_haru3mama [Summer Vacation Craft] A Spinning Piggy Bank 🌻 “At-Home Crafts” book 📕 on sale now! (Available on Amazon, Rakuten, and bookstores nationwide) Purchase via the link in my profile 🔗 ⇨ @silk_haru3mama ————————————— Thank you for watching∗︎*゚ I’m Silk, and I share easy crafts and at-home play ideas that make you think, “I can do this!”✩︎⡱ This year, I’ll be introducing various ideas perfect for summer vacation crafts again 🌻 This time, I came up with a fun piggy bank whose blades spin every time you put in a coin! The direction of the spin changes with each coin, so you’ll want to keep putting more in 🤭 Give it a try if you like ♡ We’re using an empty seaweed container, so you can easily take the money out from the bottom lid 👍🏻 Materials • 2 empty seaweed containers (cylinders, 10 cm diameter, 11 cm tall) • 1 milk carton • 2 bamboo skewers • 1 straw • Colored vinyl tape • Clear tape • Awl • Scissors • Ruler How to make it *A more detailed tutorial will be posted on YouTube. You can get to YouTube from the link in my profile, so check it out there too. 1) Cut out the bottom of the seaweed container with a utility knife. 2) Make a hole from the lid side at a height of 6 cm that’s wider than the bamboo skewer. 3) Cut off the bottom of the milk carton, open it flat, then cut two strips 4 cm wide and four strips 2 cm wide. 4) Fold the 4 cm strips into a cross as shown in the video and secure with clear tape. 5) Cut the four looped tips of the cross, then fold about 5 mm from the edge outward to open them up. Wrap the entire piece with colored vinyl tape (large blade). 6) Fold the 2 cm strips into a cross in the same way, and wrap vinyl tape around the four root sections. Cut off the outer parts that were not taped (small blade). 7) Cut the straw into four 5 mm pieces. 8) Thread a bamboo skewer through the hole in the seaweed container, then slide on: straw → small blade → large blade → small blade → straw. 9) Make another unit the same way, stack the two containers so the lids are at the top and bottom, and tape them together. Trim the protruding bamboo skewer, leaving about 1–1.5 cm. 10) Cut a coin slot about 3 cm wide into the top lid, and you’re done!! I’d be happy if you check out my craft book too!! ↓↓↓ About the “At-Home Crafts” book 📚 All crafts use recyclables, familiar materials, or items from 100-yen stores, so even busy caregivers or those who feel clumsy can think, “I can do this!” It’s full of easy-to-make, repeat-play handmade toys for kids ☺️ Whether you want to make a toy by hand, enjoy crafting with your child, or need ideas for an elementary school craft assignment, I hope it helps in many situations as your child grows. ———————————— “Build fine-motor skills and sensory growth! Parent and child will get hooked! At-Home Crafts for ages 3 to elementary school” 𖤘 Publisher: KADOKAWA 𖤘 Price: 1,500 yen (tax excluded) (1,650 yen incl. tax) *Available on Amazon, Rakuten, and bookstores nationwide ———————————— At-home play, educational toys, making#HandmadeToysSimple crafts for home play by lsilk, home crafts by ilsilk, summer vacation crafts and research
♬ Everyday/Cute Piano Solo(1512061) – Sumochi
Why not make a fun piggy bank where the coins spin as they go in? It’s a perfect idea for a summer vacation craft.
First, slice a milk carton into rings, press the corners to flatten the center space, and make four “blades” to form a propeller.
Decorate the edges with vinyl tape, and make two large propellers and four small ones in the same way.
Skewer a large propeller on a bamboo stick, then add two small propellers on each side to create a spinning mechanism.
Insert this into a clear tube, make a coin slot in the lid, put the lid on, and you’re done.
Pudding charm
@n.annlee321 They have that cup at the 100-yen shop 🤤💕#100-yen shop DIY#100-yen-shopDaiso#DaisoPurchases#HandmadeToys#Summer VacationSummer Vacation CraftChildcaretranslation
♬ Lilac – Mrs. GREEN APPLE
Everyone loves it! Let’s make a pudding charm inspired by that beloved treat.
For the base, use a clear cup for sweets deco from a 100-yen shop.
Mix brown paint into glue to mimic caramel and spread it on the bottom of the case, then pack in yellow yarn.
Draw the package design on thick paper, cut it into a circle, and attach it to the case.
Punch a hole and thread through charm hardware to finish.
You can also substitute brown yarn for the caramel section.
Sunflowers to make with kids
@silk_haru3mama Summer craft: Making sunflowers with kids 🌻Summer Vacation CraftTranslationMontessori Educationbasting (stitch); tackingworkSummer vacation#AtHomePlay
♬ Don!! – Ryokuoushoku Shakai
This is a sunflower craft whose finely layered petals evoke the fun of summer.
First, make the center part out of cardboard or thick paper, then attach the petals to it.
Punch holes in the round center piece and thread string through them to faithfully recreate the look of a sunflower’s center.
After that, just glue the petals around the edge and you’re done—the key is how you choose the petal colors and how you layer them.
For a more realistic look, it’s also recommended to curl the petals to add a three-dimensional effect.