Crafts you can make with 100-yen shop items! A collection of fun project ideas that elementary school kids will love


“Amazing crafts from dollar store materials!?” Eye-catching ideas like these are hugely popular among kids right now.
From original keychains and colorful lanterns to fluffy squishies, you can actually make surprisingly high-quality projects with materials you can find nearby.
Here, we’ll introduce fun craft ideas using dollar store supplies that even elementary school children can easily try.
Find your favorite project and enjoy making it!
- Simple yet amazing crafts: craft ideas that elementary school students will want to make
- [For Elementary School Students] A Collection of Simple Handmade Gift Ideas
- Simple but awesome! Craft ideas for upper-grade girls
- [For Girls] Make It with Everyday Items! Easy but Super Cute Craft Ideas
- Let's make it with 100-yen shop materials! A roundup of Christmas craft ideas
- [Indoor Activities] A Collection of Craft Ideas Recommended for Elementary School Students
- A collection of summer vacation craft ideas made with 100-yen shop materials
- For summer vacation homework! Simple and amazing crafts for elementary school students that you’ll want to make after seeing them
- [Easy and Simple] Popular DIY Ideas You Can Make with Materials from 100-Yen Shops
- [Summer Vacation Crafts] Stylish Ideas for Girls
- [For Adults] Simple yet Impressive Crafts: A Stylish, Eye-Catching Collection
- Christmas crafts for adults: stylish project ideas you'll want to display
- Kids get hooked on crafts with toilet paper rolls! Idea collection for elementary school students
Sparkly and Cute Crafts (91–100)
Japanese-style pancake made of clay
@pinksoda_yumi I’m going to make Japanese-style pancakes out of clay!Handmade#SweetsDeco#FakeSweetsResin clayJapanese confectioneryclay#handmade#fakesweets#wagashi#japanesesweets#clayPink Soda#Wagashi
♬ Happy Music – Mystix Instrumentals
Perfect for a summer vacation project! Why not try sweets art with “Japanese-style pancakes made from clay”? Recreate pancakes in clay to look amazingly real—fluffy batter topped with whipped cream, sweet red bean paste, chestnuts, and sweet potato, inspired by traditional Japanese ingredients.
It’s a stylish and fun craft that results in Japanese sweets that look just like the real thing.
The key to making it realistic is carefully reproducing details like the browned, toasted color.
Try adding the browning with a sponge.
You can also display your creation in your room and use it as decor!
How to make a Disney kids’ lunch (bento)

A full-on adorable independent study on “How to Make a Disney Kids’ Lunch.” Think up and create your own Disney-style kids’ lunch that looks cute and exciting—like Mickey-shaped chicken rice, an omelet, fried shrimp, a hamburger patty, potato salad, and more! It’s an edible work of art, perfect for people who love cooking and design.
You can make everything with paper clay, so it’s super easy.
Even if you can’t easily go to Tokyo Disneyland, making this craft will let you feel like you’ve enjoyed a kids’ lunch there.
Sparkly, Cute Crafts (101–110)
Make and Play! Cake Shop

Simple to make yet impressive enough to make you say “Wow!” This craft lets you create a realistic-looking blackberry cake and have fun while doing it.
You can easily get the materials at 100-yen shops, and it’s simple to do at home.
Using soft, squishy paper clay, you can make adorable sweets that are fun to touch and pleasing to the eye! Practice your decorating skills with piping cream and coloring, and boost your sense of design.
With a little creativity, you can open your very own one-of-a-kind “cake shop.” After you’re done, play cake shop with friends or display your creation as a perfect room decor piece.
Original handmade watch

When you go to a 100-yen shop or a handmade goods store, you can find just the clock movement for sale.
Let’s use that to make your own original clock! For the base of the clock, use a photo frame or a plastic plate.
Once you decide where to fix the movement, drill a hole.
Tighten the nut to secure the movement, and then decorate it to your liking.
Paint it, attach parts, or add glitter to make it sparkle—depending on your ideas, you’ll end up with a clock full of originality!
can badge

Let’s easily make them with a kit! Here are some ideas for pin-back buttons.
A pin-back button is a disc-shaped item made of materials like aluminum, typically with a safety pin or clip attached to the back.
They often feature characters or brand logos and are commonly enjoyed by attaching them to fabric items.
This time, let’s try making original pin-back buttons using a kit.
You can find button-making kits at 100-yen shops and similar stores, so give it a try!
Translucent name tag
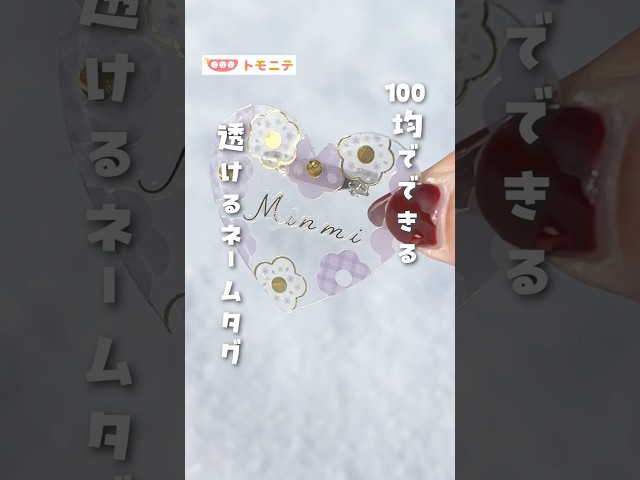
Express your individuality with a translucent look! Here are ideas for see-through name tags.
In places with many children, like elementary schools or lessons, it’s easy for belongings to get lost.
When a name tag is attached, your items are much more likely to find their way back to you! This time, let’s make translucent name tags and attach them to bags and other important items.
You’ll need deco plates, clear stickers, letter stickers, protective tape, silicone rings, keychain hardware, and more.
Customize the design to suit the item you want to attach the name tag to.
Well-spinning paper cup top
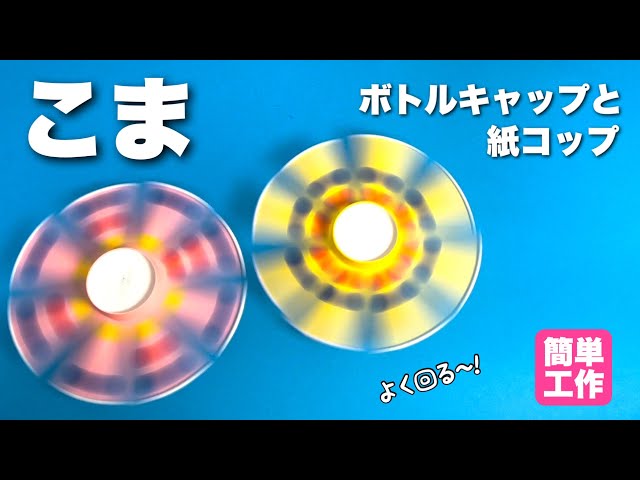
This is a spinning top made with a paper cup that spins well and is fun to watch because of its colorful look.
All you need are a paper cup and two plastic bottle caps.
First, cut slits into the paper cup and spread them out like propeller blades, then attach an axle made by combining the two caps.
That’s enough to complete the basic shape, but it’s recommended to decorate the “propellers” with an eye toward how it will look while spinning.
The impression changes depending on whether you spread the propellers before decorating or decorate first and then cut the slits, so try out various patterns.